Most people I know use Microsoft Word to write their manuscripts. But often they don’t use some of the useful functions of Word, and as a result end up with a lot of formatting and editing work in the end. Below is a guide on how Word functions can help writing clean and manageable documents in APA style.
There are three main issues:
- Use styles for formatting,
- use bibliography functions for adding references, and
- do proper footnotes with the functions built into Word.
Start from a template that has already the right formatting styles
Use a document that has proper formatting styles already defined to start. For instance, the apa.docx. (It is based on a APA 6 template from Microsoft, which I found useful but not ideal). Just open the file, save it with a new name, and delete what you do not need.
Use styles for most formatting
When you add headings, don’t format them by hand (ie., with the formatting buttons in the Home ribbon). Instead, format them with the predefined styles.
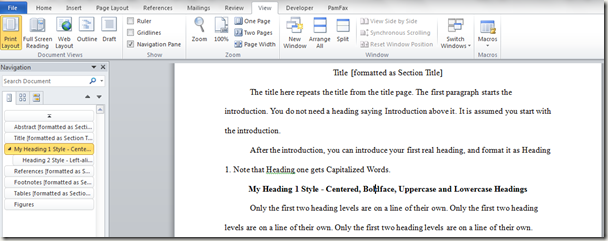
To do that, mark the paragraph you want to format, or just put the cursor in it, and use the Styles accessible from the Home ribbon. In the screenshot, the paragraph that has the cursor in it is formatted as Heading 1.
The advantages of styles are:
- The headings are always correctly formatted.
- You see the heading structure when you switch the Navigation Pane on
- When you are done and export your document to PDF, it will have the document structure as well.
The apa.docx has the following helpful styles
- Normal – for your regular text
- No indent – for text where the first line should not be indented, such as text in tables, and figure captions, table titles, table notes
- Section Title – use for the headings “Abstract”, the repeated title on the third page, “References”, “Footnotes”, “Tables”, “Figures”
- Heading 1 … Heading 5 for the actual headings in your text
- Bibliography – use for the references
These styles will do most of the formatting you need to do. In addition, you should only need to use the Italics button.
When you paste text that you copied from other documents or from the web, it is often already formated. Use Home – Paste – Paste Special and paste as Unformatted Text, or format with the Normal style after pasting to get rid of the wrong formatting.
The Styles for Section Title and Heading 1 already introduce a page break before them. So you don’t need to manually add a page break there.
To take advantage of the document structure you create by properly formatting the headings, turn the navigation pane on:
Bibliography
Depending on how many references you have to add, you can use more or less sophisticated means:
If you have only a few, you could simply use cut and paste. When you search a paper in Google Scholar, you have several options below the link – cited by XXX; related articles; all the X versions; and cite. If you click in the last one “cite”, you get the reference already in APA style, You just have to copy-paste it to Word then.
If you have more references, you can use the Bibliography function that is built into Word. If you have a lot of references, I recommend Mendeley (http://www.mendeley.com) or Endnote (http://endnote.com/) instead.
Either way, format them with the Bibliography style. Every line except the first one should be indented.
If you use the built in Bibliography function:
To add new citations, go to Reference ribbon – Citations & Bibliography group – Manage sources
Then Reference ribbon – Citations & Bibliography group – Insert Citation for in-text citations
Then Reference ribbon – Citations & Bibliography group – Bibliography – Works cited to add the bibliography.
If you have more than 10 references, I recommend Mendeley or Endnote.
Use track changes and comments when working collaborating with others
If you are collaborating with others, and revise or change others’ drafts, turn on Track Changes in the Review ribbon, and add comments with New comment. If a colleague forgot to do that, you can still recover some of that functionality if you use the Compare function on the Review ribbon, which lets Word search for changes and mark them.
Do proper footnotes
Adding footnotes is one of the tricky tasks in APA formatted word Documents. The reason for the difficulties are that APA used to ask for Footnotes to be on a separate page title Footnotes, located after the References, but before other pages like Author Notes, Tables, and Figures. The only way to do that is to add notes as Endnotes, to specify that Ednotes get displayed after a Section break, and to place the section break where the Endnotes should appear. The guide below shows in detail how to do that.
However, APA 6 now also allows to place footnotes in the manuscript directly as footnotes, so you can do that if you prefer that.
Never create footnotes by putting the numbers in by hand and formatting them as Superscript). That only creates huge headaches when you want to add or remove footnotes, and then have to renumber everything.
If you want the Footnotes on one page after the References
Here is how to enter Footnotes that appear as Endnotes on a page after the References:
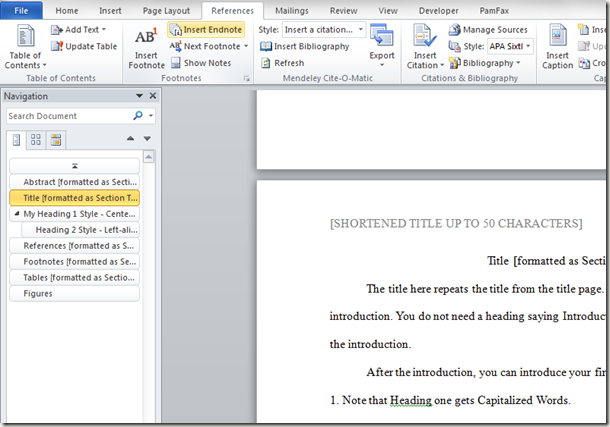
Insert your notes as Endnotes: References Ribbon, Insert Endnote button.
If you use the apa.docx, that should be it, and the footnotes should appear in the proper place.
If not, or if you work with a previous doc of your own, you need to fix it with the following steps.
Troubleshooting Step 1 – get rid of the annoying line before the footnotes (only if you don’t use apa.docx)
This step you do not have to do if you use the apa.docx I have prepared. This first step removes the annoying line that shows up before the footnotes.
After you entered an endnote, search for it at the end of the document. It will look something like this, with the unnecessary line above it. It’s difficult to remove.
Open the extra Footnotes menu: In the References ribbon, click on the small “Dialog box launcher” at the lower right corner of the Footnotes group.
In the dialog box that opens, select “End of section” as the location of your Ednotes, and choose Number format 1, 2, 3. Click Apply.
Turn on the paragraph marks to see what is going on in hidden formatting:
Change to Draft view
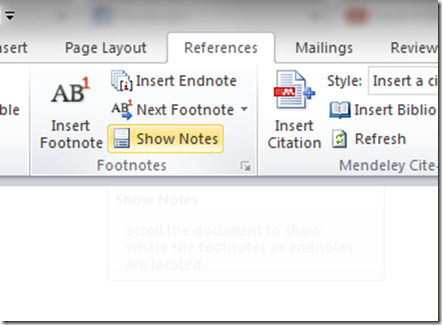
Click Show Notes in References ribbon.
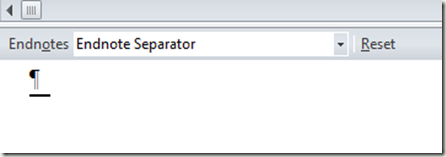
An extra box opens. In this box, you can select the Endnote Separater. The line appears.
Delete it
Also delete the Endnote Continuation Notice
Change back to Print Layout
Done.
Tell Word to place Endnotes in the right place (only if not using apa.docx)
The following step is also already done in the document, but if your footnotes suddenly appear at the end of the document, you might have accidentally deleted it. Here is how to restore it:
Place your cursor after the Footnotes section title (you might want to turn on paragraph marks to see it)
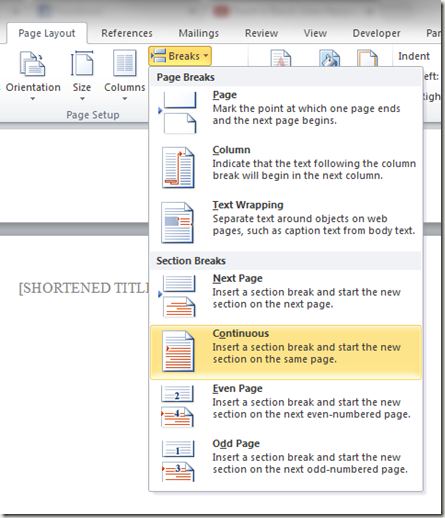
Then, in Page Layout ribbon, go to Breaks, and add a Section Break with Continuous text flow.
It will look like this: Your endnotes are now appearing after the section break.
Format them as Normal


